
One of the features in Hyper-V is the ability to take snapshots of your virtual machine. This allows you to revert the machine back to a previous state without the need to use windows backups or an alternative. All explained in this article. However snapshots may be convenient they are not recommended by Microsoft to be used in a production environment as seen in this TechNet article. The reason being is that they can end up consuming excess disk space and if you are not careful can end up causing any virtual machine on the same hard disk to be automatically put into a ‘Paused-Critical’ state due to the lack of disk space. Snapshots are also not a valid substitution to proper machine backups.
All this being said some people still use snapshots as they can be handy if you are strapped for time and unable to perform a full backup before a major change is applied to a machine. However any snapshot should be deleted in the Hyper-V console and merged ASAP to avoid any problems and prevent extra disk space being used.
After a snapshot is deleted from the console window it is not merged to the parent virtual hard disk until the virtual machine is shutdown. Merging should start automatically when any virtual machine is shutdown. This will merge any deleted snapshots that are associated with that virtual machine to the parent Virtual Hard Disk. Leaving you with no snapshots ready for the machine to be booted up again. However the bigger the snapshots the longer it takes for them to merge. Another reason why they should not be used in a production environment. If a snapshot has been ignored for a period of time its associated AVHD will grow in size, using up disk space. This means you could be taking a production server offline for a long period of time while you twiddle your fingers waiting for the merge to finish.
The good news is if it completes the merge successfully happy days! However if it doesn’t then you have a problem. The two main problems are that it doesn’t have enough disk space to complete the merge. This is because it will merge all the data it needs from the snapshot into the parent virtual disk before it deletes the snapshot, so effectively it copies the data it needs then deletes the snapshot. This is to avoid losing data if the merge fails. So an example is if your physical hard disk has 500GB storage and the VHD on it is 300GB and you have a snapshot which is 150GB then you have a problem. Because:
300 (Virtual Hard Disk)
150+ (Snapshot)
150+ (Data copied from snapshot to Virtual Hard Disk)
=600 (Bigger than the physical = bad news!)
This is a bit of an exaggeration as all of the data from the snapshot might not be copied across to the VHD as it may not all be needed. But this does emphasize the problem.
The second reason it doesn’t merge is because it has just decided it doesn’t want to (I can’t give you an explaining, I never found one).
If it is either one of these problems then you will have to merge the snapshots manually. First of all as with anything like this you will want to make sure you backup your data. Make sure the virtual machine is shutdown and copy the virtual machine hard disks to a safe location as show below:
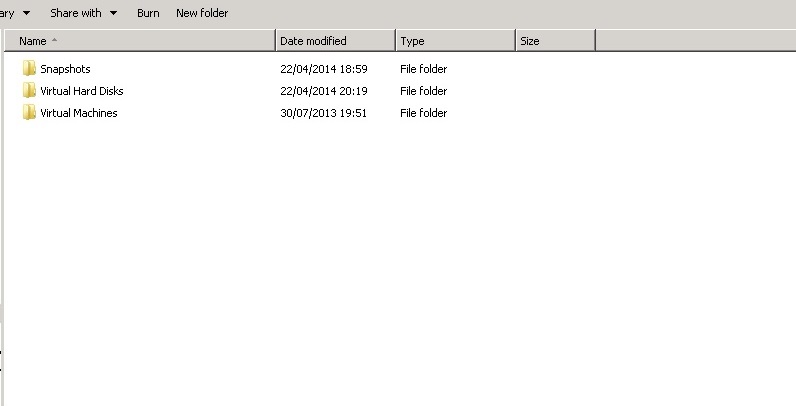
 As you can see there can be a lot to backup. Next if you look in the ‘Virtual Hard Disks’ folder you will see the original VHD’s along with some AVHD’s.
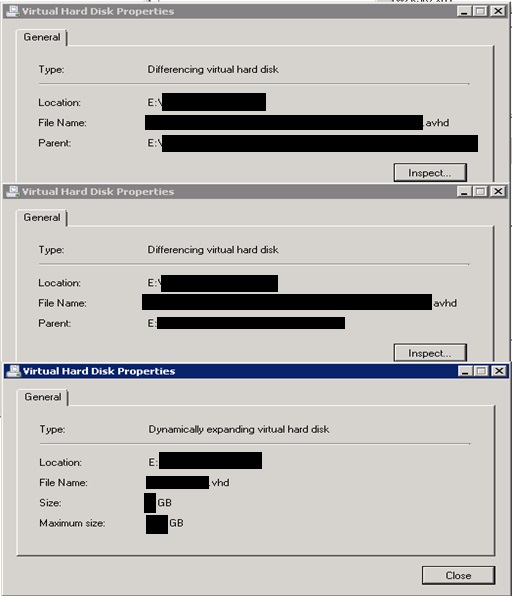
 The VHD’s are the original Virtual Hard Disks. The AVHD’s are the remains of the snapshots. In this instance I had one virtual machine with two hard disks, one holding the OS and the other used for data. The virtual machine is using all of the files here to operate. You will note that one of the AVHD’s is nearly as large as its parent VHD. That’s a lot of data to merge! And takes a lot of space. This is where if you don’t have enough hard disk space you are going to have problems. As there is not enough space to merge them on the current hard disk you will have to move them to another disk with enough space and follow the rest of this guide. If you try and merge without enough disk space it will fail.
It is also not uncommon to have more than one AVHD linked to a single VHD. When this happens they are effectively in a kind of daisy chain state, running through each other up to the parent VHD. If this is the case the solution is the same but you have to merge them from the bottom up, oldest to the newest. In the Hyper-V console if you click ‘Inspect Disk’.
 Then select the oldest AVDH, this will then give you the parent which will be another AVHD. Click Inspect again to show the next and so on until you reach the parent VHD. This gives you the order to merge them in. As shown below.
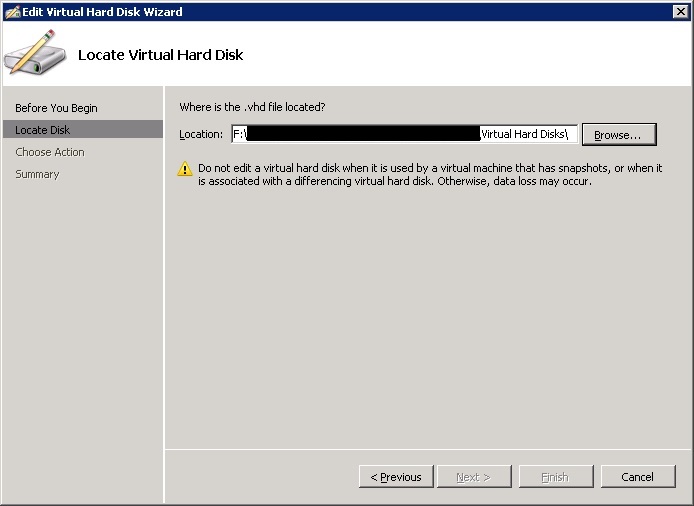
 Whether you have multiple AVHD’s or just a single, the merge process is the same. First go to the Hyper-V console and select edit disk.
 Click Next
 Select the location of the AVHD’s to be merged.
 Then select the AVHD (If you only have one AVHD select that, if you have multiple select the oldest which is at the bottom of the chain which we saw earlier when inspecting the disks)
 Next select ‘Merge’.
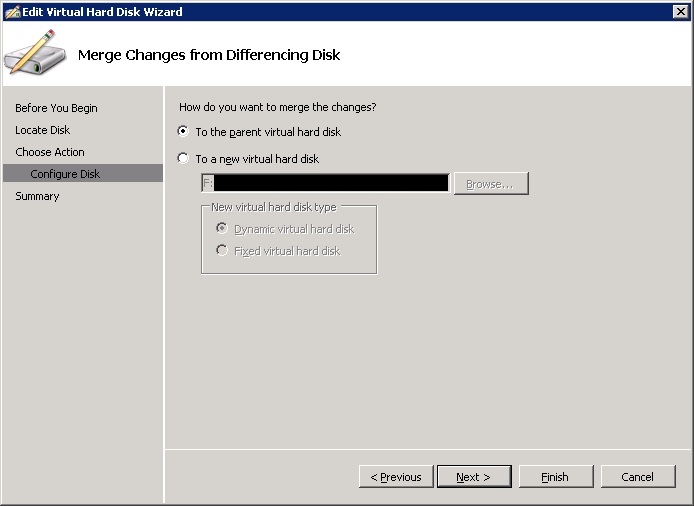
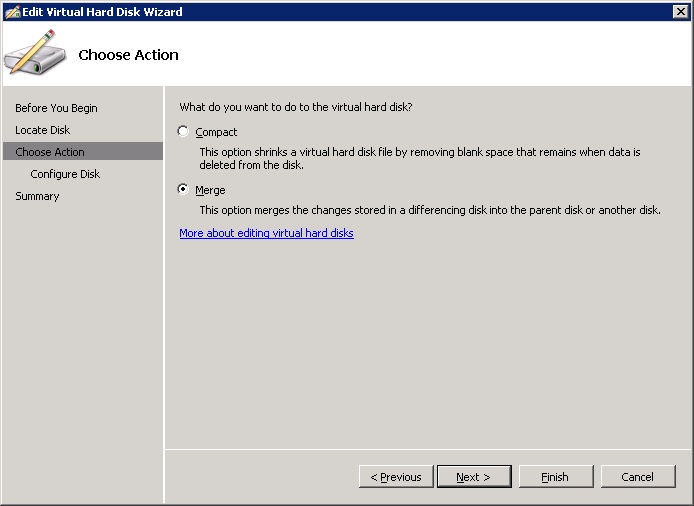 Then select ‘To the parent virtual hard disk’.
 You will get a confirmation page. Click Finish.
 At this point if you have one AVHD it will be merged to the main VHD. If you have multiple AVHD’S to one VHD it will merge to its parent AVHD.
 This can take a few minutes to a few hours depending on the size of the AVHD. Once it has finished if you only had the one AVHD you will be left with one fully merged VHD. If you had multiple AVHD’s you will need to repeat this process again with the rest of the AVHD’s until the last one is merged into the parent VHD.
Once this is all done you will be left with only VHD’s in the virtual hard disks folder. The last thing we have to do is change the settings on the virtual machine. This is to tell the VM where the newly merged VHD is. This is because it would have previously been pointed at one of the AVHD’s which is no long there. In the Hyper-V console click on the virtual machine you need to edit and click setting. Under Hard Drive you need to point it at the newly merged VHD.
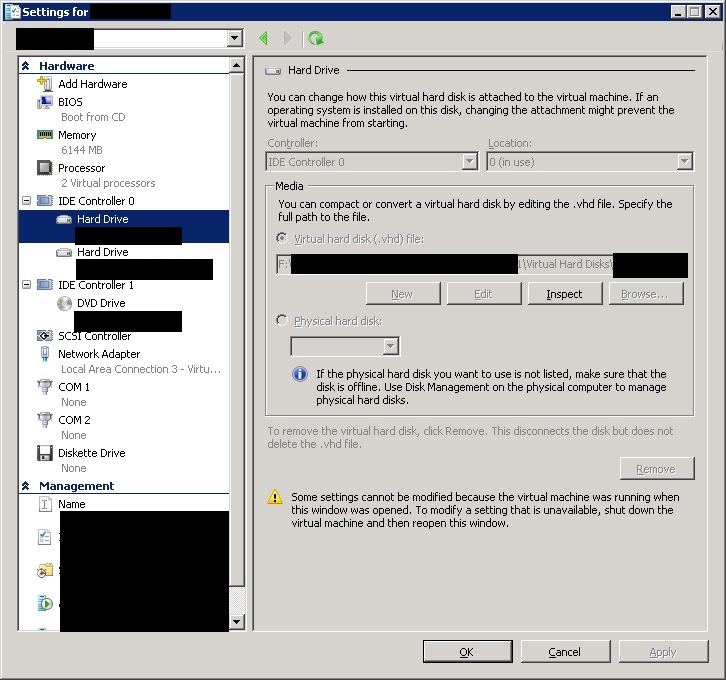 You can see on mine that it has 2 hard drives, one for the OS and another for data. Point each one at the corresponding VHD and click Ok.
And that’s job done! You can now boot the virtual machine back up.